Official User Guide
HoloMapper Documentation
Learn how to use HoloMapper, a projection mapping software tool for creating mapped visuals on projectors and external displays. This guide covers keyboard shortcuts, surfaces, layers, groups, media movement, text, corner warping, mesh warping, Bezier warping, masks, chroma key, presets, animations, live inputs, output formats, output rotation, and saved .hmap project files.
This documentation page is a quick-start guide and reference manual for HoloMapper users working with projection mapping, video mapping, GIFs, text, projector output, surface alignment, live inputs, visual presets, output formatting, and saved project workflows.
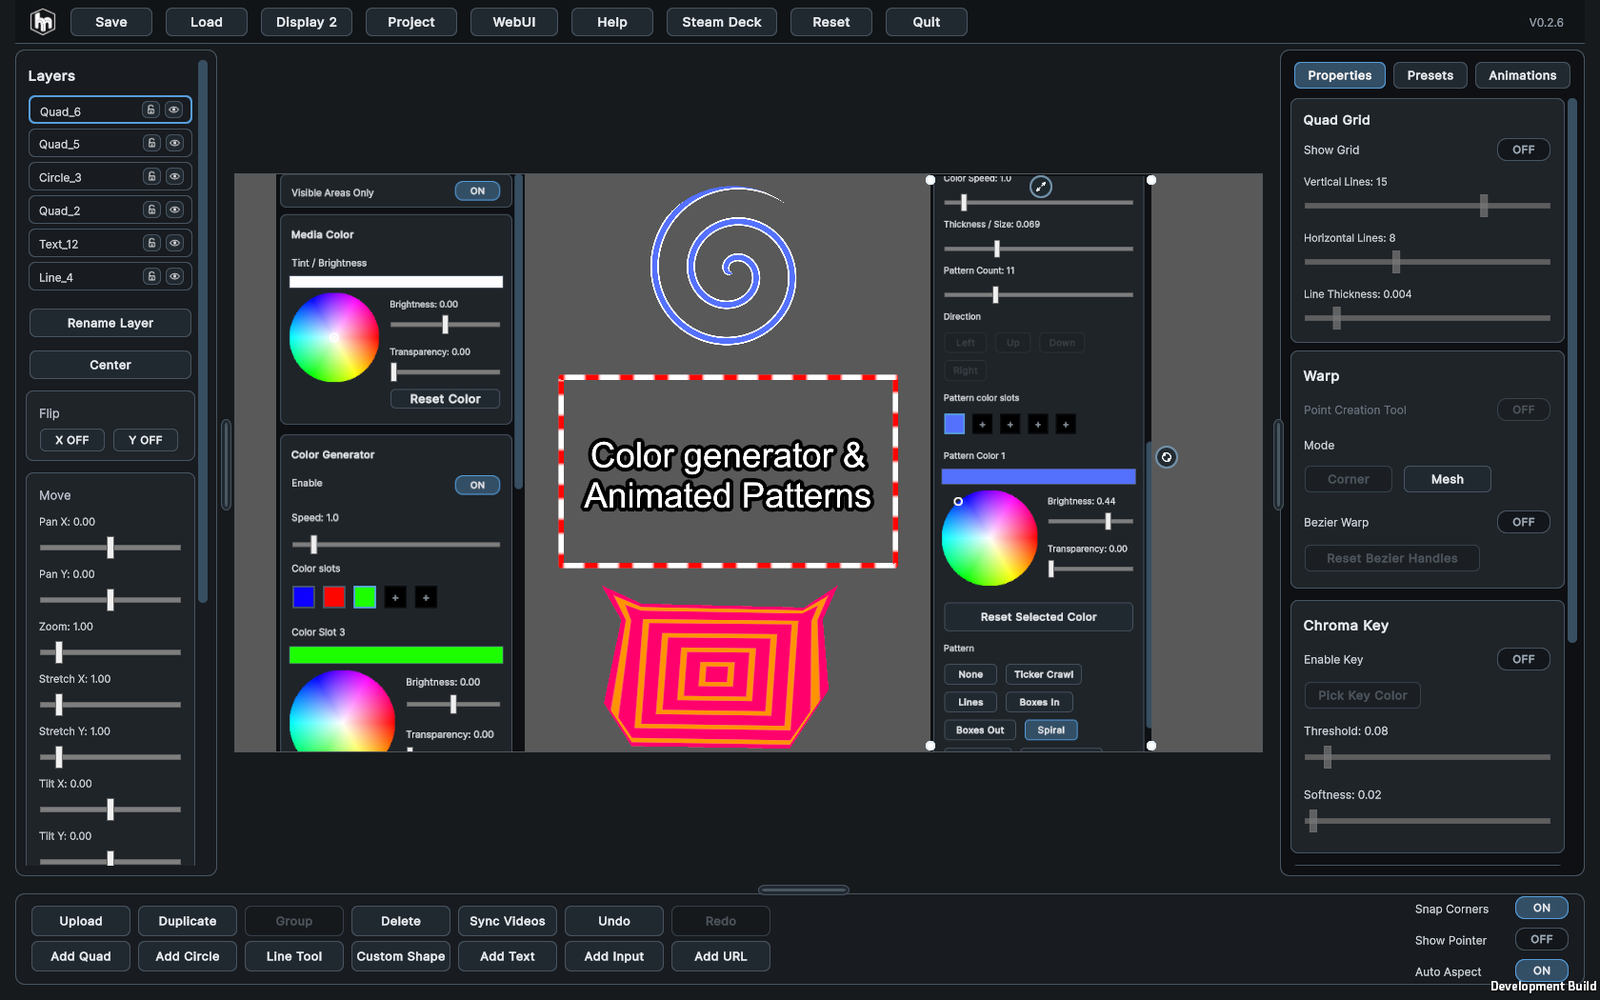
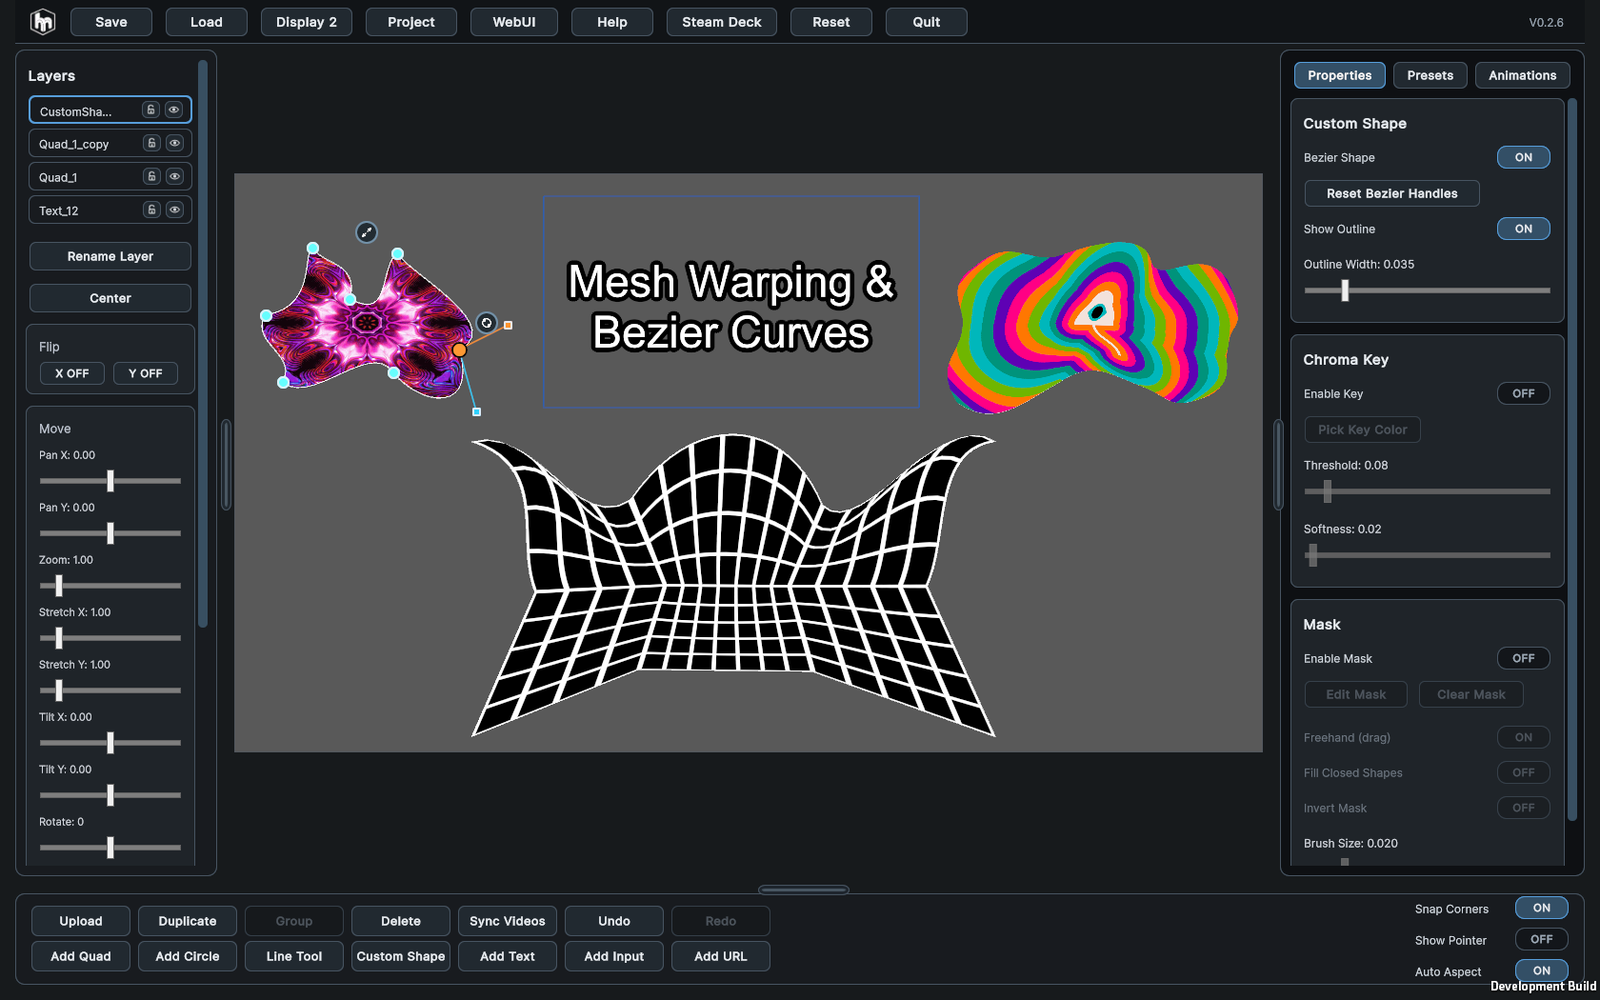
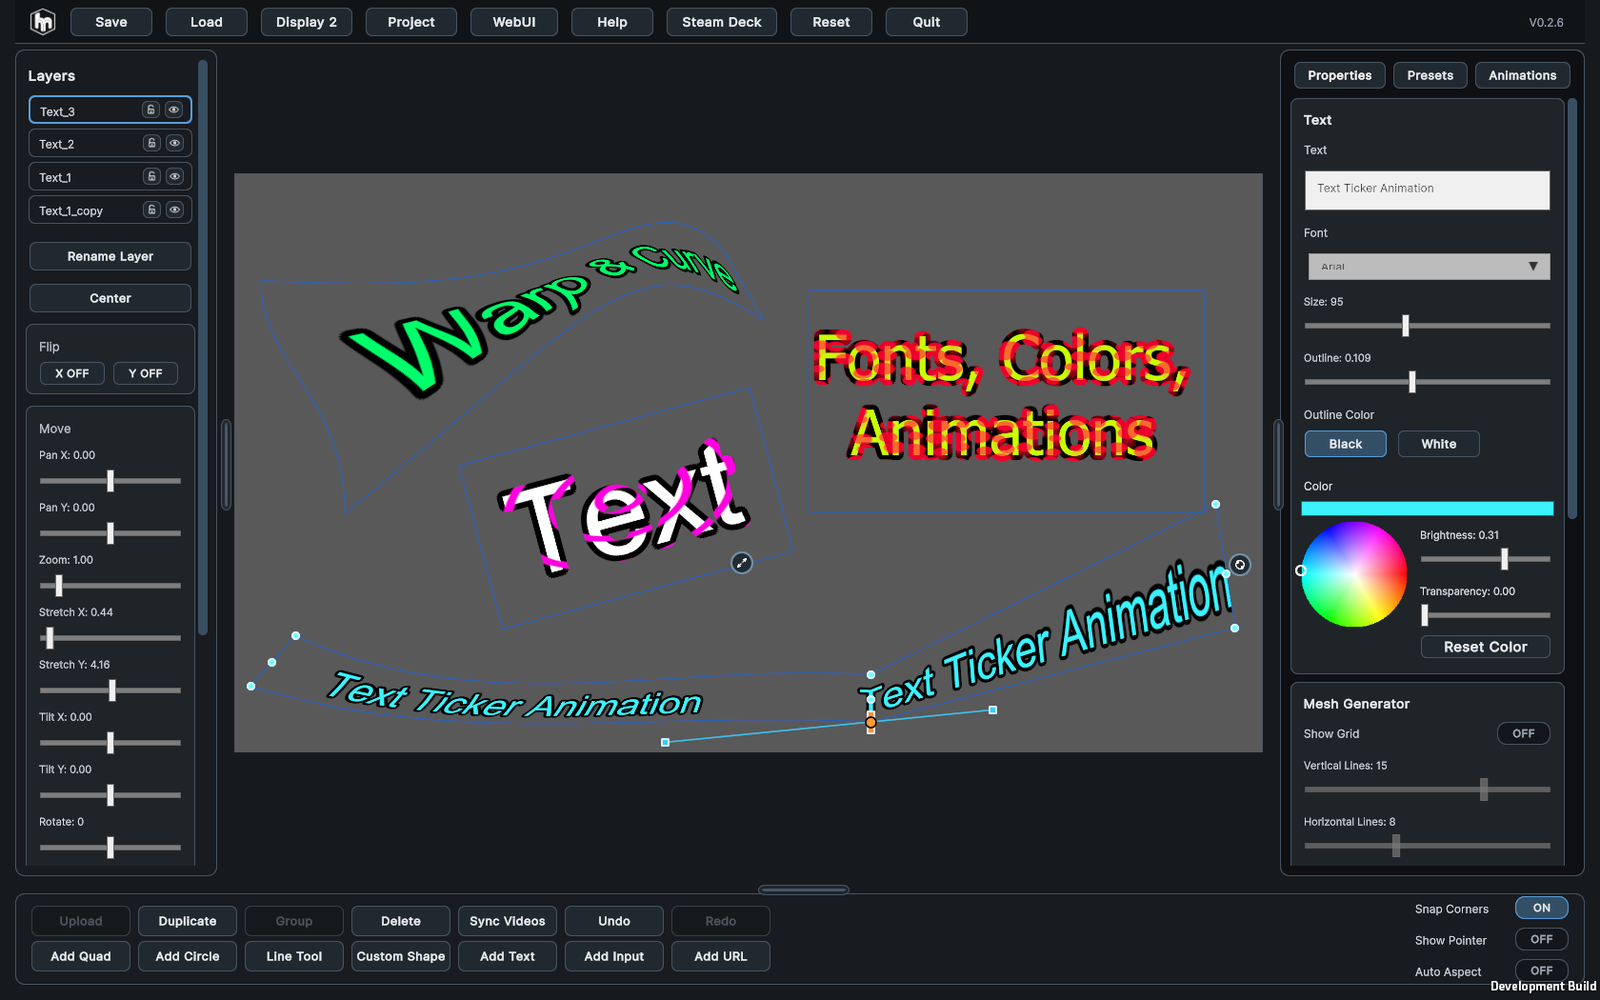
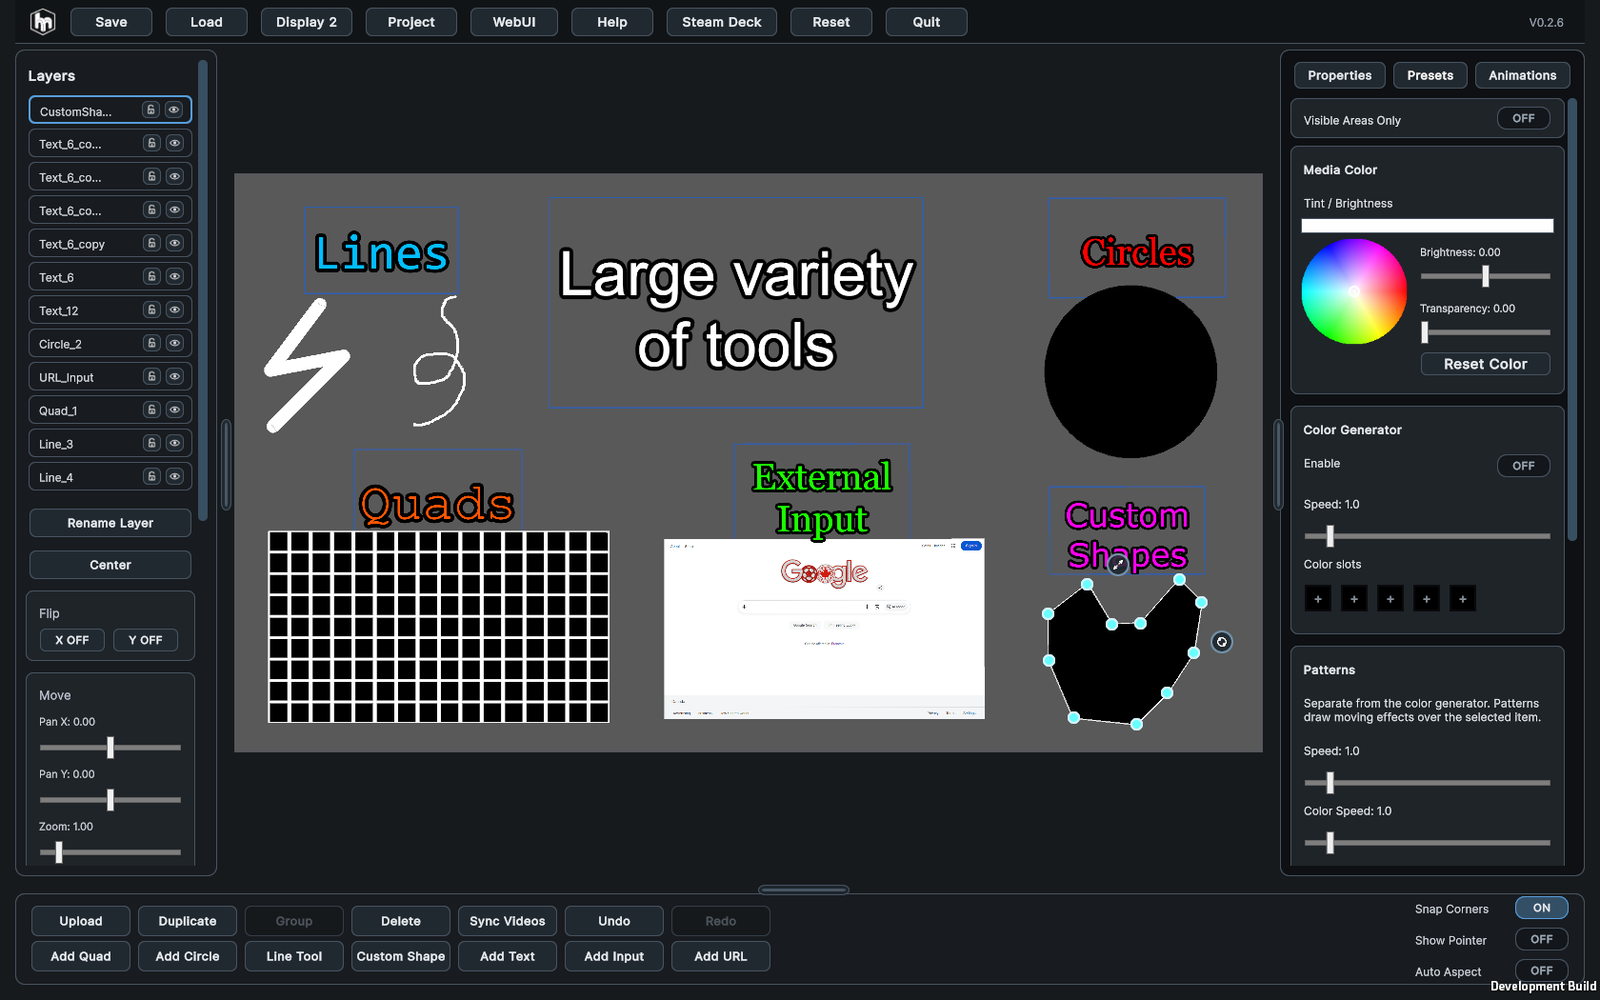
Interface Preview
HoloMapper Screenshots
A quick look at the HoloMapper editor, tools, mesh controls, text controls, color controls, presets, properties, menu, and input workflow. Click any screenshot to open it fullscreen.
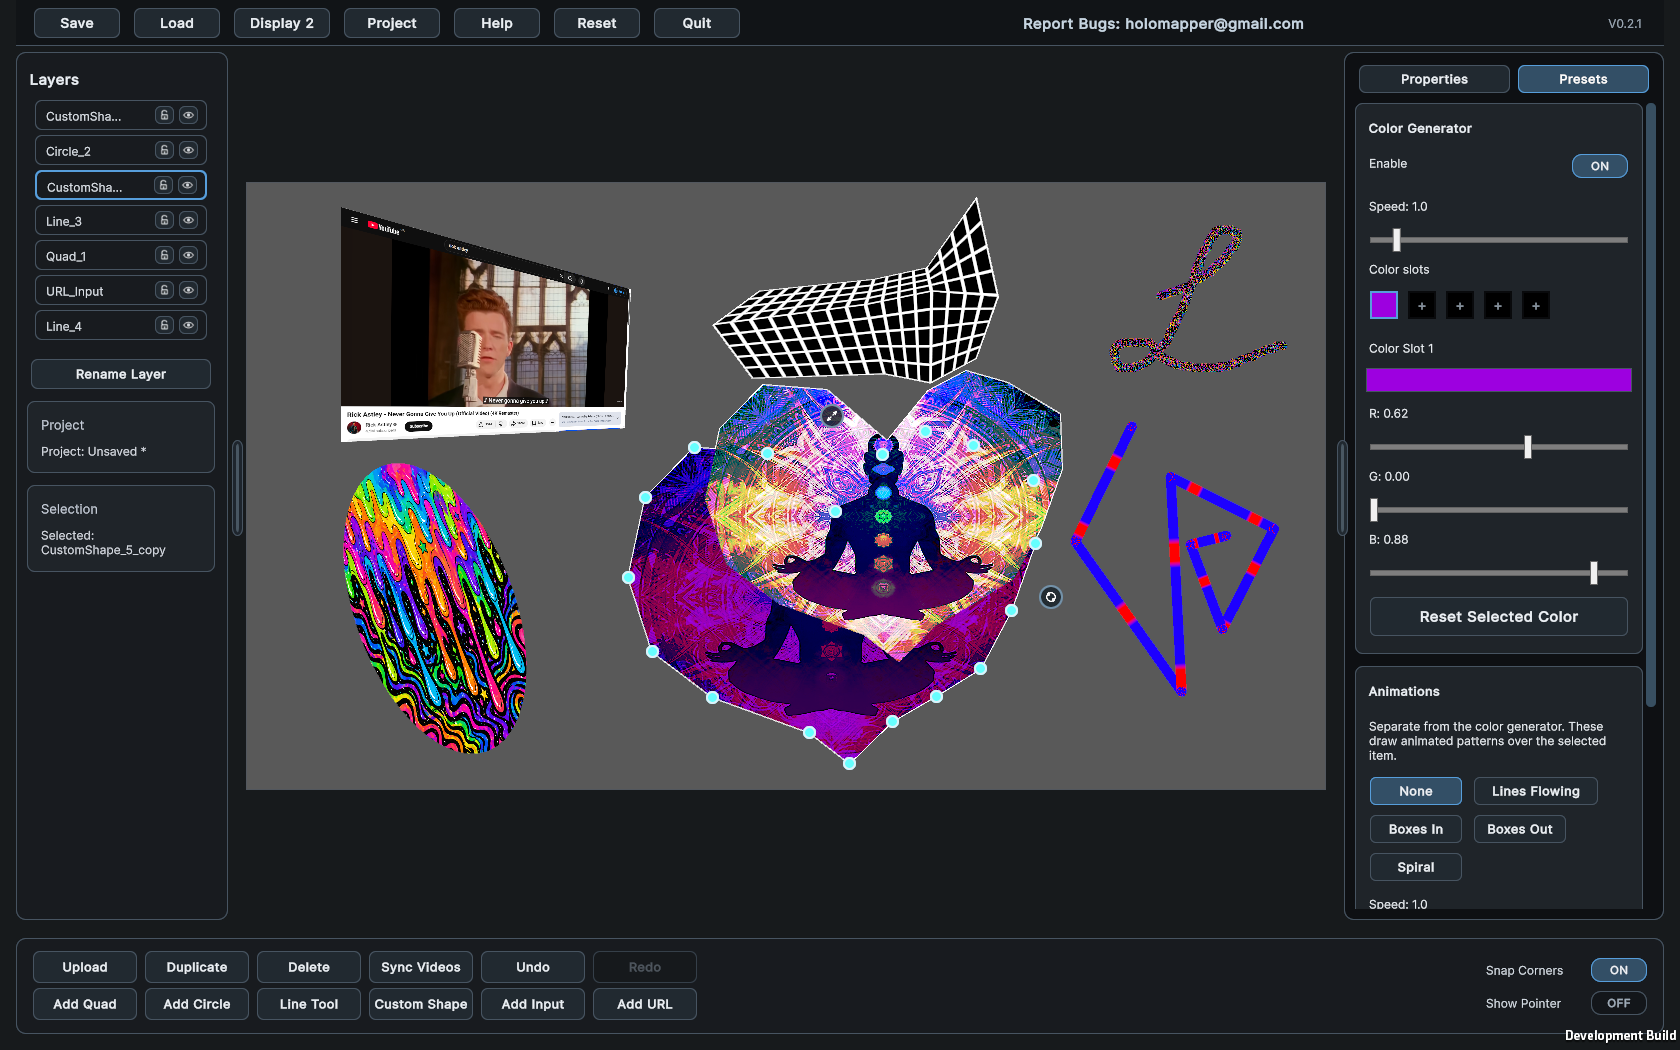
Full HoloMapper Interface
The main workspace gives you access to surface editing, layers, properties, media controls, presets, input tools, and projection output setup in one focused layout.

Keyboard Shortcuts
Use these keyboard shortcuts to work faster inside the HoloMapper projection mapping editor.
- Ctrl + ZUndo
- Ctrl + Shift + ZRedo
- Ctrl + YRedo
- DeleteDelete selected surfaces
- F10Start or pause projection
- TabSelect the next editable point
- Shift + TabSelect the previous editable point
- Arrow KeysFine-adjust the selected point
- Shift + Arrow KeysMove the selected point faster
- Shift or Ctrl + Rotate HandleSnap surface rotation to 90-degree steps
- Shift or Ctrl + Drag Quad CornerSnap a corner straight with nearby 90-degree edges
- Mouse WheelZoom the editor view
- = or Numpad +Zoom in
- - or Numpad -Zoom out
- Middle Mouse DragPan while zoomed in
- EscCancel active tools or edit modes and clear selected surfaces
- EnterConfirm layer rename
- Esc while renamingCancel layer rename
Basic Workflow
HoloMapper uses a surface-based workflow. Add a surface or input, assign media or configure the source, position it, adjust its shape, choose the output format, and send the clean output to a projector or external display.
- Add a quad, circle, line, custom shape, text, window input, or URL input.
- Select it, then upload media or configure its source.
- Move, rotate, scale, warp, mask, or style it as needed.
- Choose an output format and display, then press Project.
- Use Sync Videos if video timing needs to restart together.
- Save your work as an .hmap project file.
Selecting and Moving Surfaces
Surfaces are the main objects used in HoloMapper. Each surface can hold an image, video, GIF, text, generated visual, input source, or other projection mapping content.
- Click a surface once to select it.
- After it is selected, drag it to move it.
- Drag a selection box to select one or more surfaces.
- Shift-click surfaces or layer rows to multi-select.
- Click empty background to clear selection.
- Use the scale handle to resize the selected surface.
- Use the rotate handle to rotate the selected surface.
- Hold Shift or Ctrl while rotating to snap rotation in 90-degree steps.
- Use Center to bring the selected surface back to the middle of the edit frame.
- Use the side and bottom handles to hide or show the menus.
- Handles remain usable when corners are pushed outside the visible editor area.
Layers
The HoloMapper layer system lets you organize multiple projection mapping surfaces from front to back. Layers can be reordered, hidden, locked, renamed, duplicated, and multi-selected.
- The Layers panel lists surfaces from front to back.
- Drag a layer and release on the insertion line to reorder it.
- Use the eye button to hide or show a layer.
- Use the lock button to protect a layer from edits.
- Use Rename to rename the selected layer.
- Use Duplicate to copy selected surfaces and their settings.
- Multi-selected surfaces can be moved, rotated, scaled, and reordered together.

Groups
Groups let multiple surfaces act together, making it easier to manage larger projection mapping layouts with many layers.
- Select multiple surfaces, then use Group to keep them together.
- Clicking any surface in a group selects the full group.
- Grouped surfaces appear as one Group row in the Layers panel.
- Properties and Presets apply to compatible surfaces inside the selected group.
- Use Ungroup while the group is selected to separate the surfaces again.
- Groups are saved and restored with the project file.
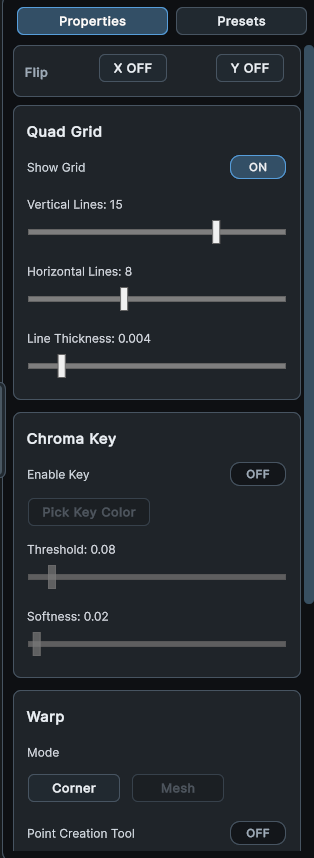
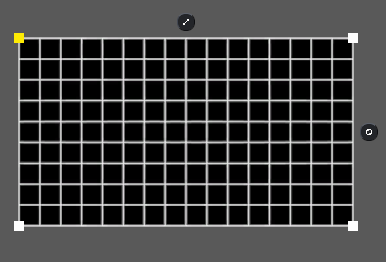
Quads and Grid
Quads are the standard projection mapping surface in HoloMapper. They are useful for mapping images, videos, GIFs, and generated visuals onto walls, panels, screens, signs, boxes, stage pieces, and other rectangular surfaces.
- Add Quad creates a black projection surface.
- Upload supports PNG, JPG, JPEG, MP4, and GIF.
- Turn on Auto Aspect before uploading to resize the quad to the media aspect ratio.
- Quad Grid adds an adjustable grid and border over the surface.
- Grid line counts and thickness are controlled in Properties.
- Flip X and Flip Y mirror uploaded media when needed.
Circles
Circle surfaces are useful for round projection targets, circular signs, lens-like effects, round props, and abstract visual layouts.
- Add Circle creates a round surface.
- Depth bends the circle inward or outward.
- The center handle moves the depth focus point.
- Uploaded media is fitted and cropped to the circle.
Lines
The Line Tool creates line-based projection surfaces. Lines can be used for outlines, borders, traced edges, visual accents, and mapped paths.
- Line Tool draws line surfaces.
- Line/Point mode places connected straight points.
- Freehand mode draws by dragging.
- Thickness and color are controlled in Properties.
- Line points can be moved after drawing.
Custom Shapes
Custom Shape lets you build filled projection mapping surfaces from placed points. This is useful for irregular objects, signs, props, cutouts, angled surfaces, and non-rectangular projection areas.
- Custom Shape creates a filled shape from placed points.
- Place the final point on the first point to close and fill the shape.
- Canceling before the shape is closed removes the in-progress shape.
- Closed shapes can use quad-style media, masking, chroma, and presets.
- Outline visibility and width are controlled in Properties.
Text
Text layers let you create projected labels, titles, signage, typography, stage text, and stylized words directly inside HoloMapper.
- Add Text creates an editable text surface.
- Use Properties to change the text, font, size, color, and outline.
- Text surfaces can use corner warp, mesh warp, Bezier Warp, patterns, and animations.
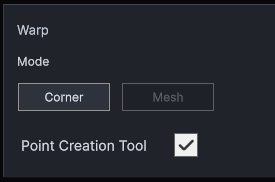
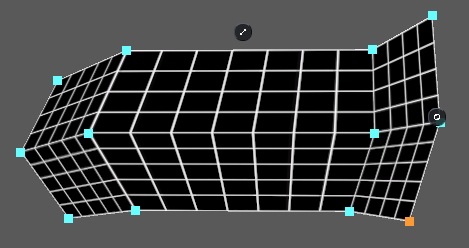
Warping
HoloMapper includes corner warping for standard projection mapping alignment, mesh warping for more detailed surface shaping, and Bezier tools for curved surfaces and custom shape outlines.
- Corner mode: drag the four corner handles for standard projection mapping.
- Mesh mode: use Point Creation Tool to add warp lines, then drag mesh points.
- Bezier Warp: enable it, select a warp point, then drag the colored tangent handles to curve the surface.
- Custom Shape Bezier: enable Bezier Shape, select a shape point, then drag its tangent handles to curve the outline.
- Snap Corners helps align corners to other surfaces and to the edit-frame corners.
- Hold Shift or Ctrl while dragging a quad corner to snap it straight with nearby 90-degree edges.
- Keyboard nudging works on the active corner, mesh point, or line point.
Zoom and Pan
The editor zoom controls help you work accurately on detailed projection mapping layouts. Zoom only affects the editing view and does not change the final projected output.
- Zoom affects only the editor view. The projected output never zooms.
- Zoom out stops when the full edit frame is visible.
- Zoom in goes up to about 5x.
- A zoom badge appears when the editor view is zoomed in.
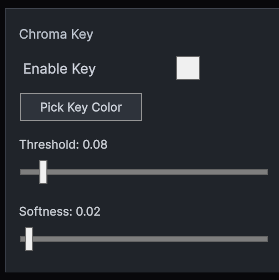
Chroma Key
Chroma key tools allow HoloMapper users to remove a selected color from a surface, which is useful for transparent-style video effects and layered projection mapping scenes.
- Enable Key to remove a selected color from the surface.
- Pick Key Color lets you click the surface color to remove.
- Threshold controls how much of that color is removed.
- Softness controls edge blending.
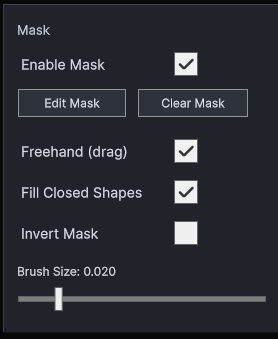
Masks
Masks let you hide parts of a surface without editing the original image or video file. This is useful for fitting projected content around objects, edges, windows, signs, props, and irregular projection surfaces.
- Enable Mask, then use Edit Mask to draw hidden areas.
- Freehand paints continuously while dragging.
- Line mode places straight mask segments.
- Fill Closed Shapes fills simple closed loops.
- Invert Mask swaps hidden and visible areas.
- Clear Mask removes the current mask.
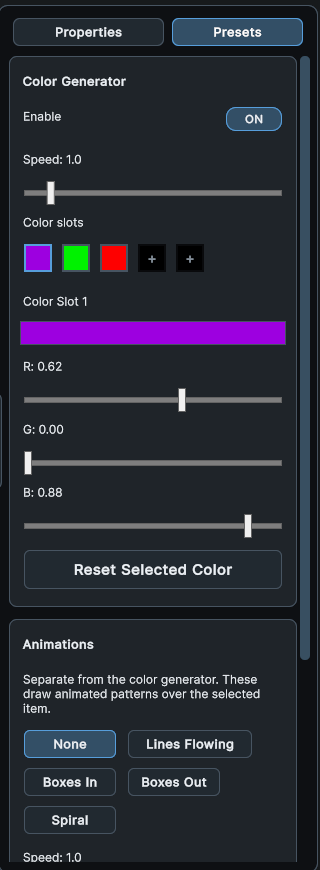
Presets
Presets add quick visual effects to the selected surface. They are useful when you want generated visuals without needing to upload a separate image or video file.
- Presets add quick visual effects to the selected surface.
- Use color wheels to choose colors, then adjust brightness and transparency as needed.
- Media Color adjusts the selected surface media separately from pattern colors.
- Color Generator cycles through selected color slots.
- Patterns add moving effects such as lines, boxes, spirals, particles, ripples, tunnels, glitch noise, radial bursts, and ticker crawls.
- Ticker Crawl repeats and slides the selected surface source, including text, images, videos, and inputs.
- Ticker Gap controls the distance between repeated copies; 0 removes the gap.
- Visible Areas Only keeps patterns out of transparent parts of the layer.
- Speed, thickness, count, direction, colors, and transparency are adjusted in the Presets tab.
- Transparency sliders start opaque; move them up to make colors more transparent.
Animations
The Animations tab lets you add reusable MP4 or GIF animation surfaces from the HoloMapper Animations folder.
- Add MP4 or GIF files to the HoloMapper Animations folder, then select them from the Animations tab.
- Click a thumbnail to add it as an animation surface.
- Use Presets > Media Color to tint or adjust its brightness and transparency.
- Use Open File Location to access the Animations folder.
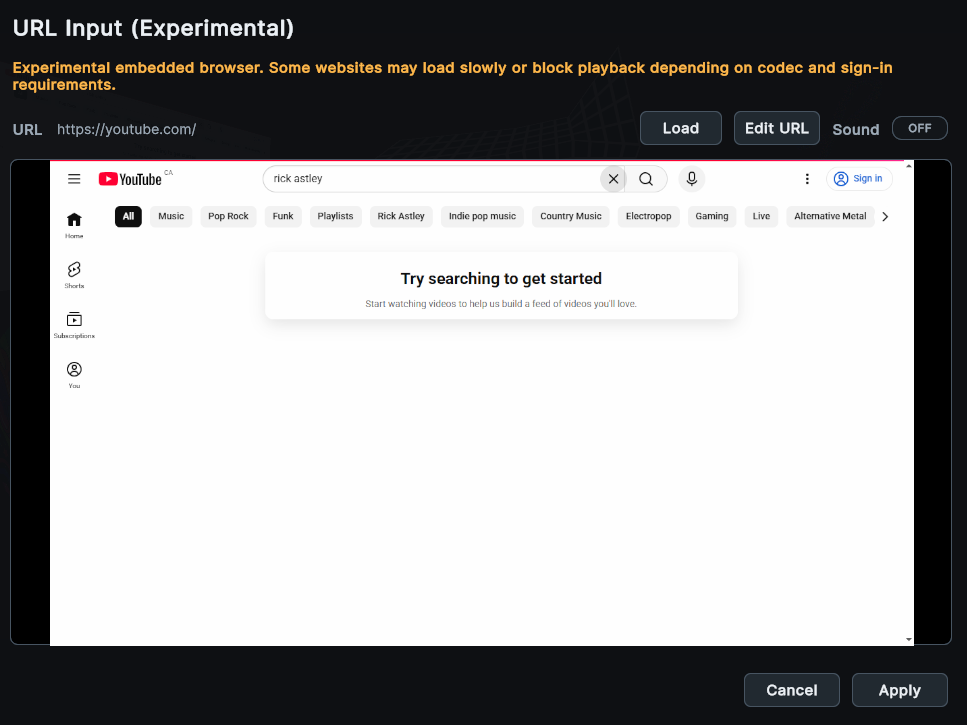
Inputs
Input surfaces allow HoloMapper to use external or live sources inside a projection mapping layout. These features are experimental and may depend on the source application, website, or operating system behavior.
- Add Input captures a selected window as a surface.
- Add URL embeds a live web page as a surface.
- Input features are experimental and may depend on the source app or website.
- Use Edit on a selected input surface to change or interact with its source.
Output
HoloMapper can send a clean output view to a projector or external monitor. The editor remains separate, while the selected output display shows the projection-ready visual layout.
- Display selects the projector or secondary monitor.
- Output Format chooses the resolution and aspect ratio for the clean output.
- Rotate Output turns the clean output clockwise by 90 degrees each time you press it.
- Use Rotate Output for sideways or upside-down projector mounting without rotating the editor view.
- Project starts clean output on the selected display.
- Pause turns off the clean output and returns to editing.
- Show Pointer displays a pointer marker on the output that matches your editor cursor.
- If a projector is connected while HoloMapper is already running, restart if prompted. Unsaved progress will be lost.
Save, Load, Reset, Quit
HoloMapper projects can be saved as .hmap project files. These files store your mapping setup so you can return to a projection mapping project later.
- Save stores surfaces, layers, media, masks, chroma, presets, inputs, and warp settings.
- Load restores a saved .hmap project.
- Reset starts fresh after confirmation.
- Quit asks for confirmation when there is unsaved progress.
Media Notes
HoloMapper supports common image, video, and GIF formats for projection mapping projects. For best video compatibility, use standard MP4 exports with common H.264 encoding.
- Supported formats: PNG, JPG, JPEG, MP4, GIF.
- Sync Videos restarts all playing videos from the beginning.
- Large videos and embedded web pages may need more system performance.
- If an MP4 behaves poorly, export it again using a common H.264 MP4 preset.
Support
For bugs, support, or feature requests, contact HoloMapper by email.
- Report bugs or request support: holomapper@gmail.com